
Looking for a way to use up those old cans piling up in your recycling bin? It’s easier than you might think to turn them into a solar heater that can help reduce your heating bills while making a positive impact on the environment. This DIY project not only saves money but also provides an eco-friendly alternative to traditional heating methods. Let’s dive into how you can build your very own solar heating system using just some empty cans.
He thought he was rescuing a sheep—but it turned out to be something else
This bizarre French customer habit is driving shop owners crazy
Why Opt for a Solar Heating System?
If you’ve ever thought about reducing your energy bills or decreasing your environmental impact, solar energy is an excellent place to start. Solar heating systems are becoming more popular, as they use free energy from the sun, which can significantly cut down on monthly utility expenses. However, the cost of installing professional solar heating systems can be overwhelming. For example, a system for a standard 100 m² home might set you back anywhere from €20,000 to €25,000.
But don’t let that deter you! There’s a simple and budget-friendly alternative: building your own solar heating panel using aluminum cans. With just a few materials and a bit of time, you can create a functional and efficient system to help warm your home.
Step 1: Preparing the Cans
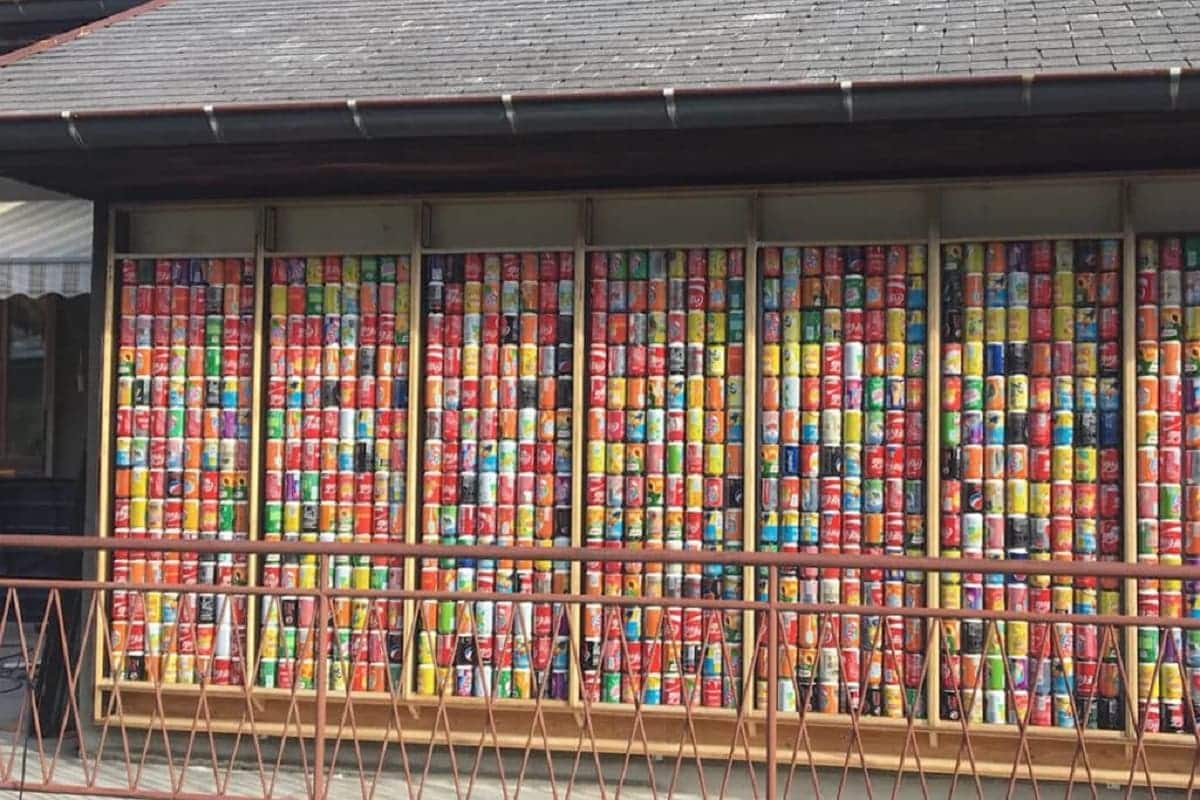
The first step in this process is getting your cans ready. Start by cutting the tops off and making a small hole in the bottom of each can to allow airflow. Once the cans are cut and cleaned, stack them vertically and glue them together using heat-resistant silicone. These columns of cans will act as heat exchangers, warming the air that flows through them.
For a panel of decent size, you’ll need approximately 196 standard 250 ml cans to build 14 rows that are about 1.85 meters high. These cans will absorb and transfer solar heat to the air passing through them, making them the central component of your solar heating panel.

Step 2: Building the Frame
Next, it’s time to build the frame that will house the cans. Begin with a plywood sheet as the backing, cutting it to the size you want. Drill two holes into the plywood—one near the top right corner and another at the bottom left—these will serve as the air intake and output points for the system.
To form the frame, cut four wooden boards to create a rectangular structure around the plywood. Additional boards are needed to support the can columns, so be sure to drill holes that match the number of rows you’ve created. Use nails and adhesive to securely assemble the frame.
Step 3: Assembling the Solar Heating Unit
Now for the fun part—putting everything together. Begin by lining the back of the frame with insulation, like rock wool, to help retain the heat. Once that’s done, carefully place the columns of cans into the frame. To maximize their heat absorption, spray-paint the cans with matte black paint.
Attach pipes for the air intake and output to the drilled holes in the plywood. Be sure to seal all connections with silicone to prevent air leakage. Finally, cover the entire frame with a plexiglass sheet, securing it in place with heat-resistant silicone. This layer will help trap heat inside the panel.
Maximizing Efficiency
To get the best results, position your solar heater on a south-facing wall (or any other spot that gets the most sunlight during the day). While this DIY solar heating system won’t completely replace your regular heating, it can easily heat a room of around 20–30 m². A panel about 2.2 meters tall should do the trick for a small space.
You’ll notice significant savings almost immediately, and over time, your investment will pay off. It’s a small, sustainable step toward reducing your heating costs.
A Sustainable, Affordable Solution
What makes this DIY solar heater project so impressive is how simple and affordable it is. By reusing items like soda cans, you can create a system that not only helps the environment but also saves you money. It’s a great example of how small, creative solutions can make a big difference. Plus, anyone with a bit of patience and basic DIY skills can tackle this project, making it an accessible way to dip your toes into renewable energy.
So why not give it a try? With just a few materials and some time, you could be heating your home with free energy from the sun. Your wallet and the planet will both thank you.
Similar Posts
- Say goodbye to expensive heating: a tutorial on building a solar radiator with cans
- Why your home feels cold even at 20°C — what really makes the difference ?
- Why do we still feel chilly at home even with the thermostat set to 20°C? Here’s what truly matters
- Why your home feels cold at 20°C — and what actually makes a difference ?
- Are your walls cold? Here’s how to warm them up without extra cost and improve your thermal comfort

Felix Marlowe manages Belles and Gals’ vibrant social media platforms. With expertise in social engagement and viral marketing, Felix creates content that sparks conversation and keeps followers coming back for more. From celebrity news to trending challenges, Felix makes sure our social media stays at the forefront of pop culture.


